Illustrated setup

Set up LexCapture, one clear step at a time.

Start with the Windows command center, then add Outlook and the Android Capture Extension if you use them. Screens use demonstration content with no real client data or reusable credentials.

Windows desktop

Install and prepare the Command Center

Complete these steps before entering real matter data.

STEP 01

Download and run the installer

Download LexCapture from the official download page, open the downloaded file, and run the installer. Because this pre-production build is not yet trusted by Windows, Windows may show ‘Windows protected your PC.’ Choose More info, confirm the app is LexCapture, then choose Run anyway. Do not continue if the file did not come from the official LexCapture download page.
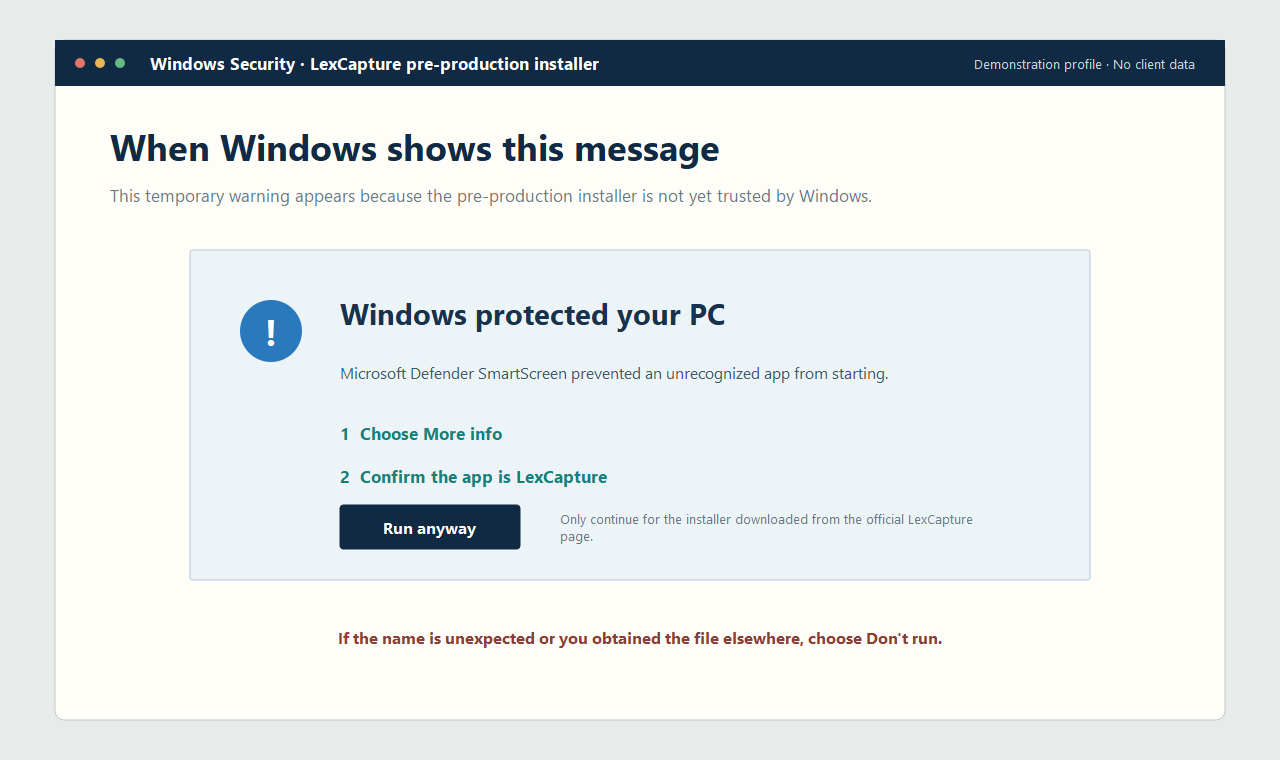
Windows SmartScreen instructions showing More info and Run anyway for the LexCapture pre-production installer
STEP 02

Launch LexCapture

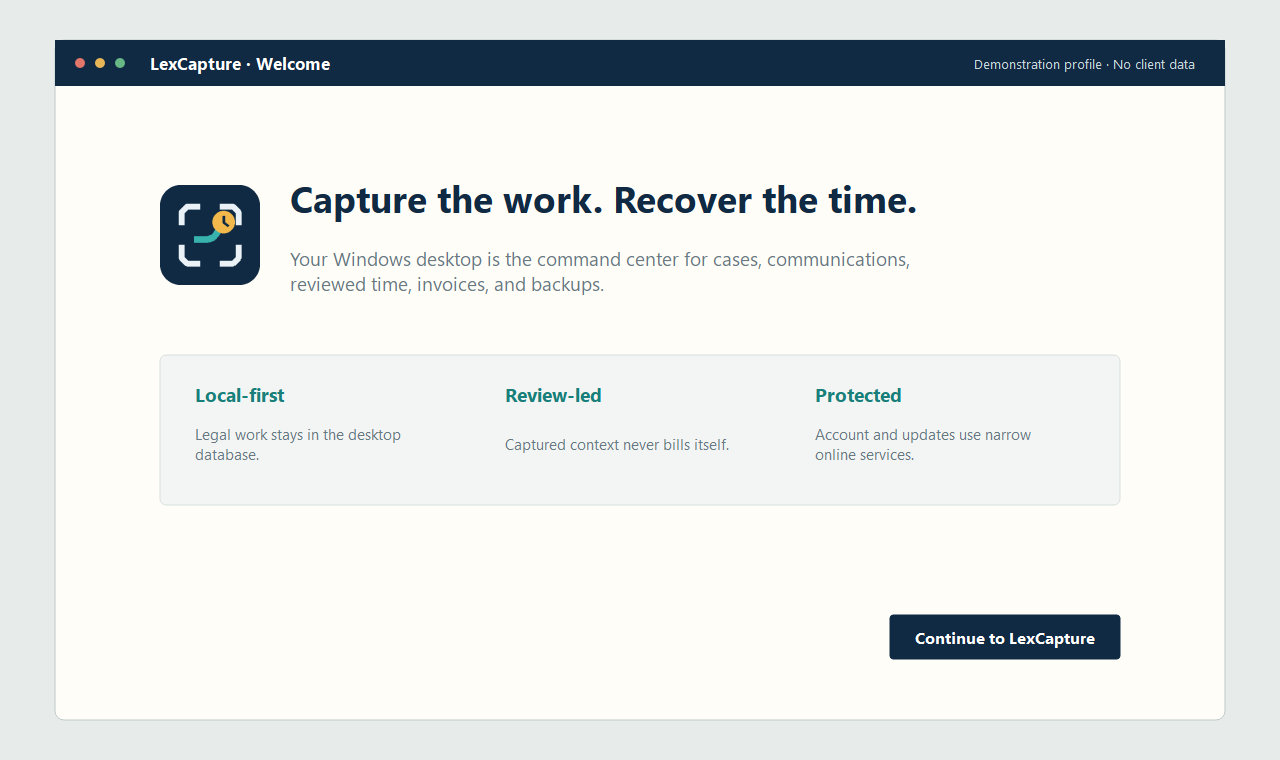
Open LexCapture from the Start menu. The first-launch screen identifies the application and keeps account activation separate from local legal data.

LexCapture first-launch window
STEP 03

Create or sign in to your account

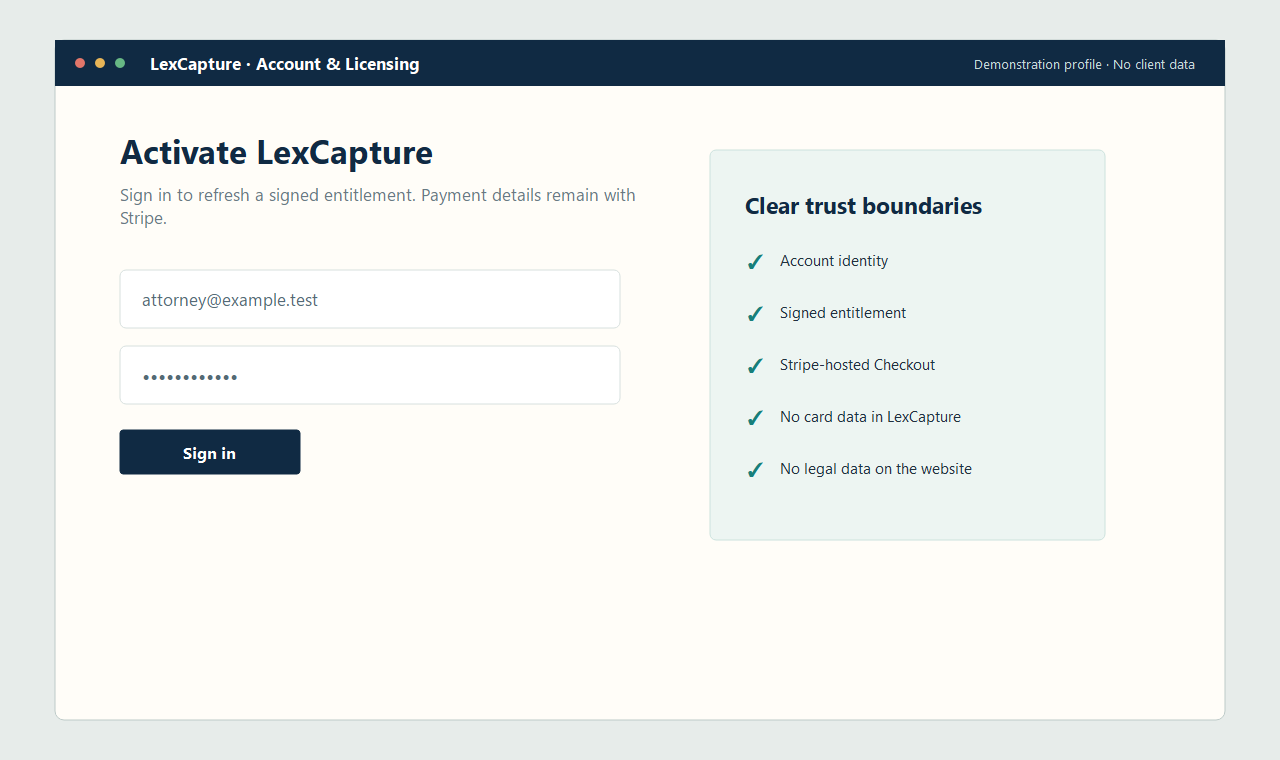
Use the desktop account panel. At commercial launch, payment continues in Stripe-hosted Checkout; LexCapture never receives card details.

LexCapture account and activation panel
STEP 04

Take the application tour

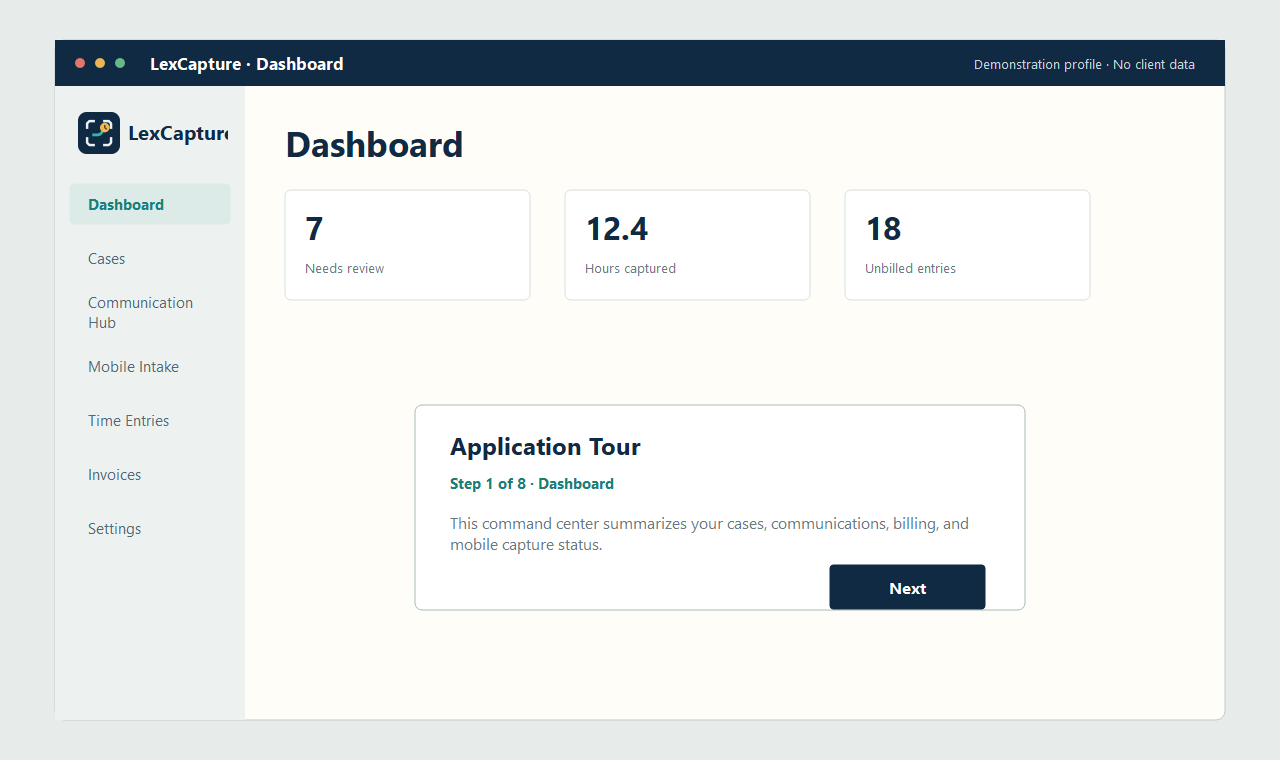
Follow the built-in tour through Dashboard, Cases, Communication Hub, Mobile Intake, Time Entries, Invoices, and Settings.

LexCapture application tour on the Dashboard step
STEP 05

Create your first case

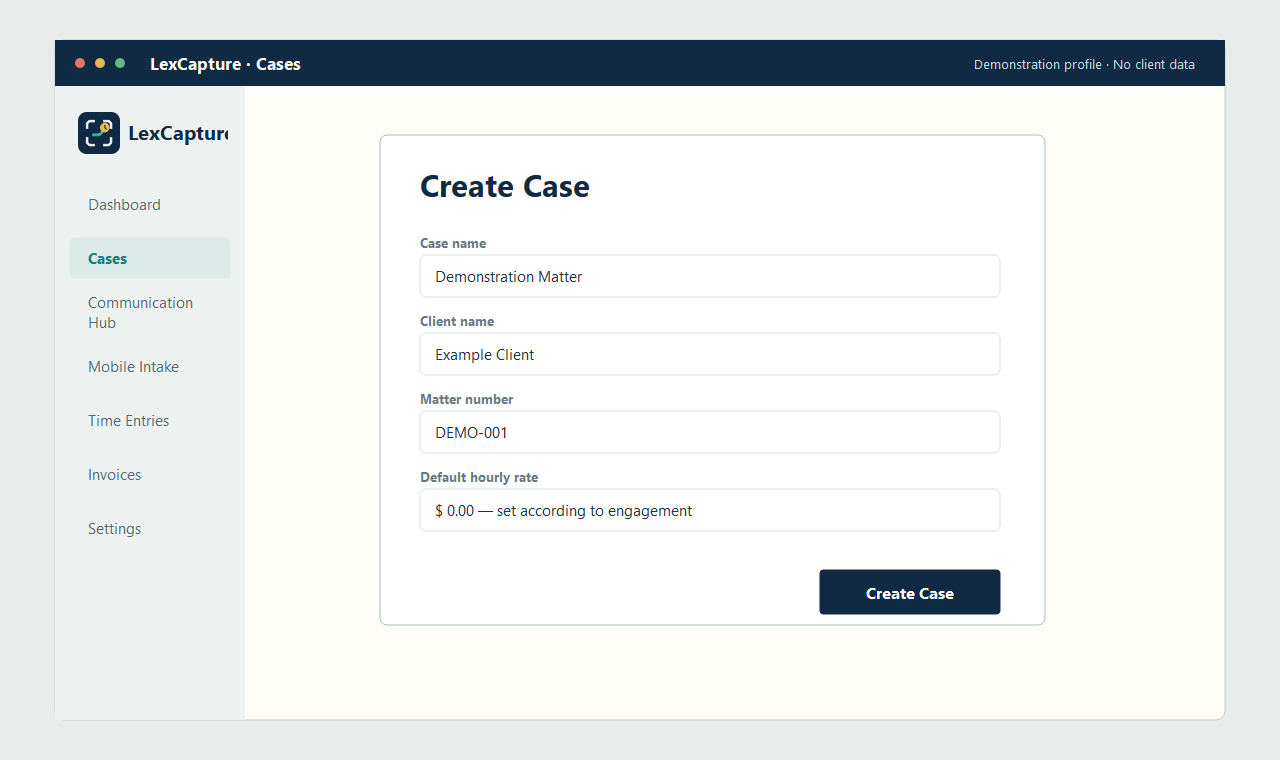
Create a matter before recording work. Confirm the client and matter details according to your firm's naming policy.

New case dialog in the LexCapture desktop
STEP 06

Create your first backup

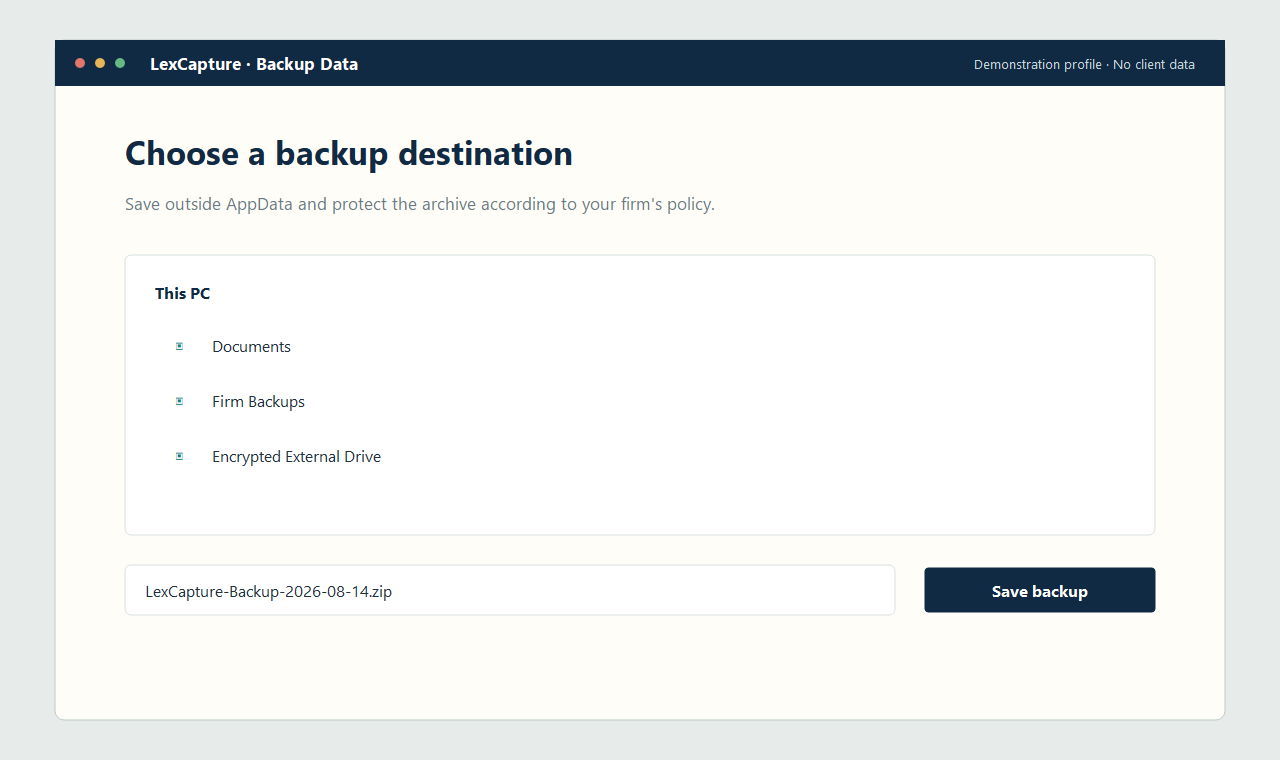
Choose File → Backup Data and save the archive outside AppData. Store it according to your firm's retention and access-control policy.

LexCapture backup destination dialog

Outlook add-in

Connect Outlook capture

Outlook provides capture context. LexCapture on Windows remains the system of record and review surface.

STEP 07

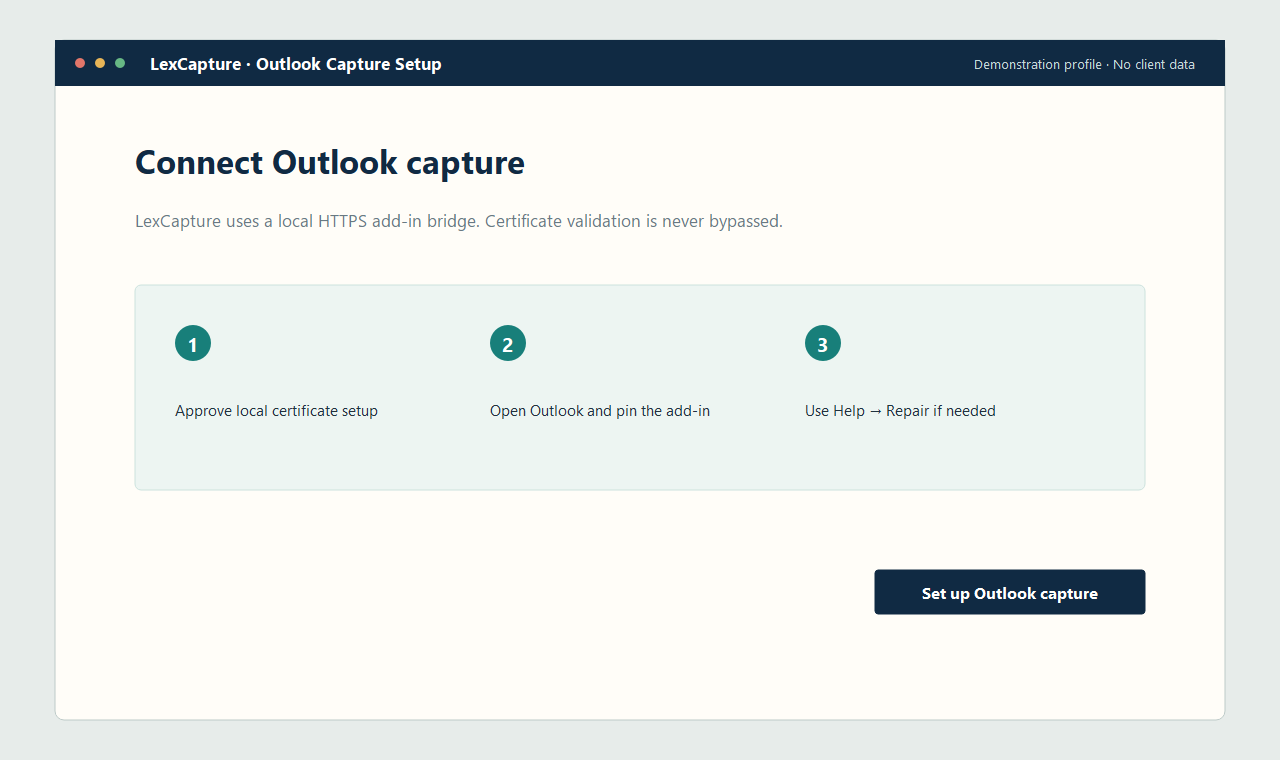
Approve the local Outlook connection

When LexCapture offers to set up Outlook capture, choose Set Up. Windows may ask for administrator approval while LexCapture installs its local HTTPS certificate. Never bypass or disable certificate validation.

LexCapture Outlook connection setup with the Set Up action
STEP 08

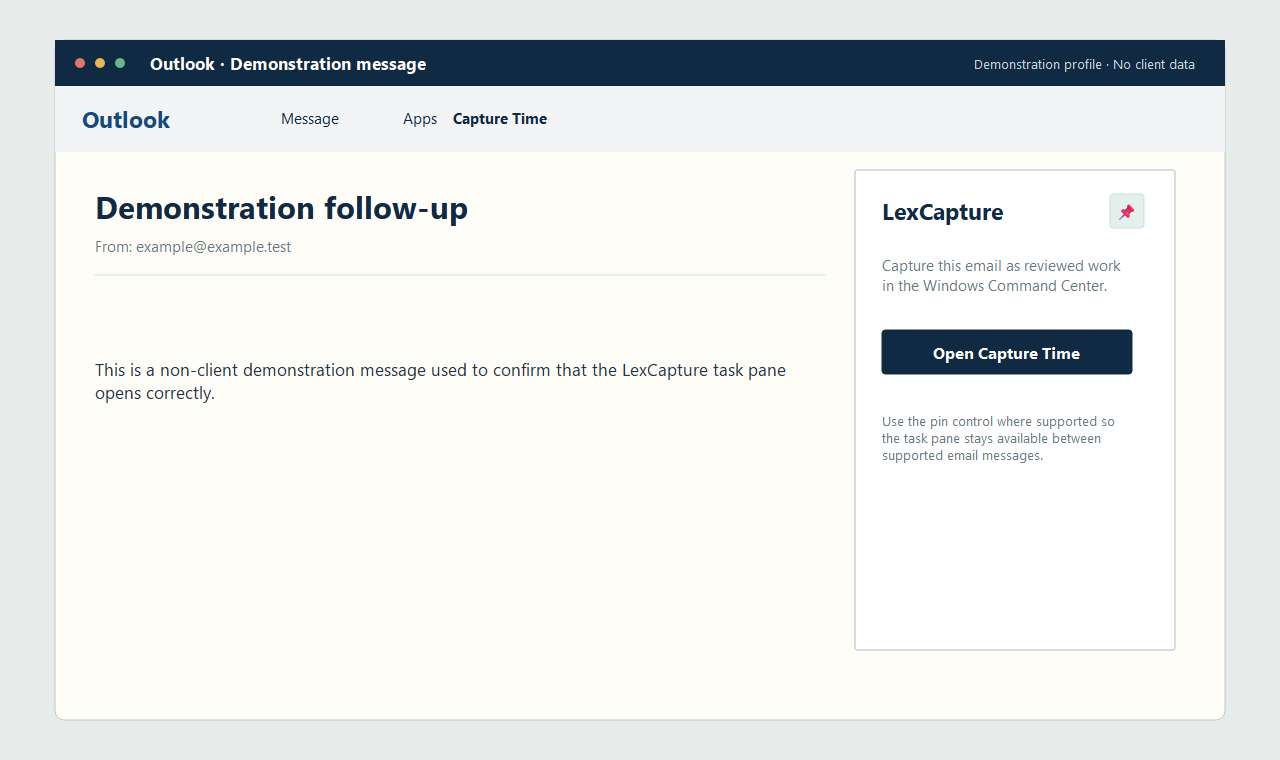
Open and pin the Outlook add-in

Restart Outlook if requested. Open an email, select Apps or the LexCapture command, open Capture Time, and pin the task pane where your Outlook version supports pinning.

Outlook message window showing the LexCapture Capture Time add-in and pin control
STEP 09

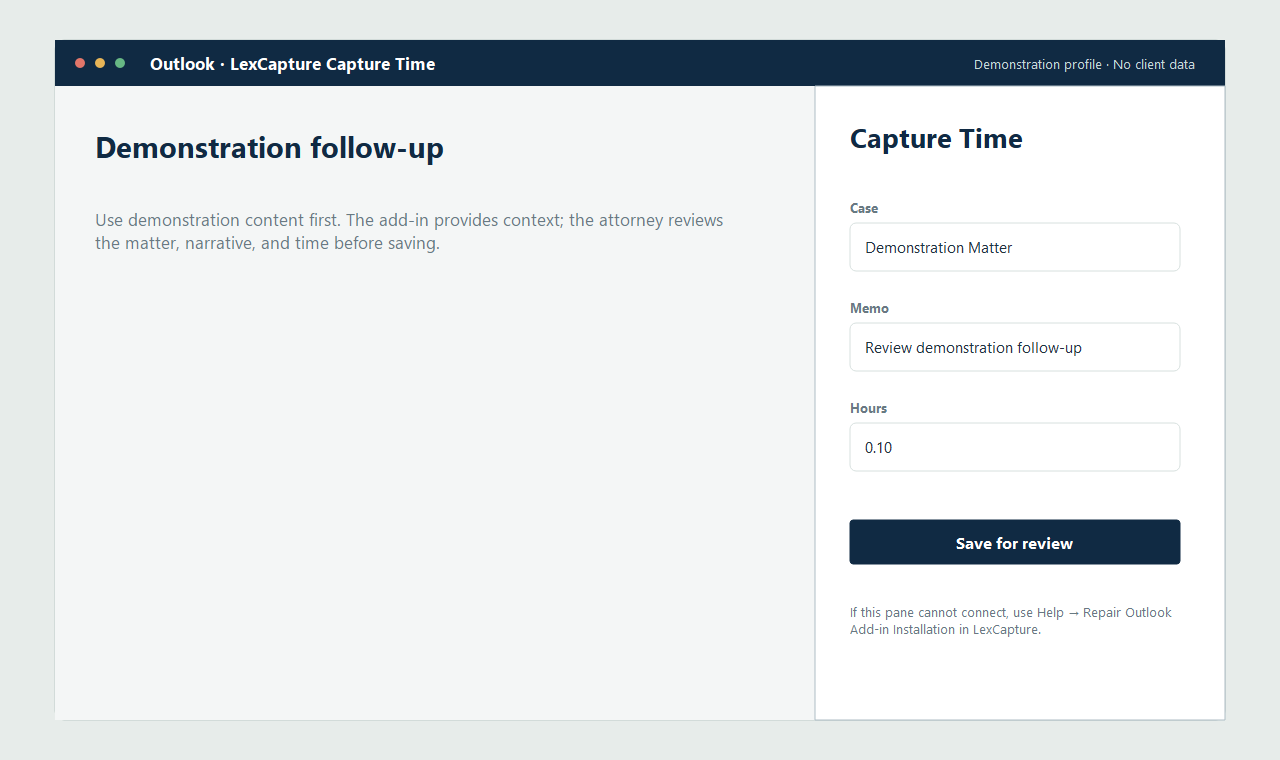
Test one demonstration capture

Use a non-client demonstration email. Review the matter, memo, and time before saving. If the add-in cannot connect, use Help → Repair Outlook Add-in Installation in LexCapture and retry.

LexCapture Outlook task pane showing a demonstration capture ready for review

Android Capture Extension

Install, pair, and perform the first sync

Android captures selected context and syncs only when you choose. It does not manage cases, invoices, subscriptions, or billing.

STEP 10

Start pairing from the desktop

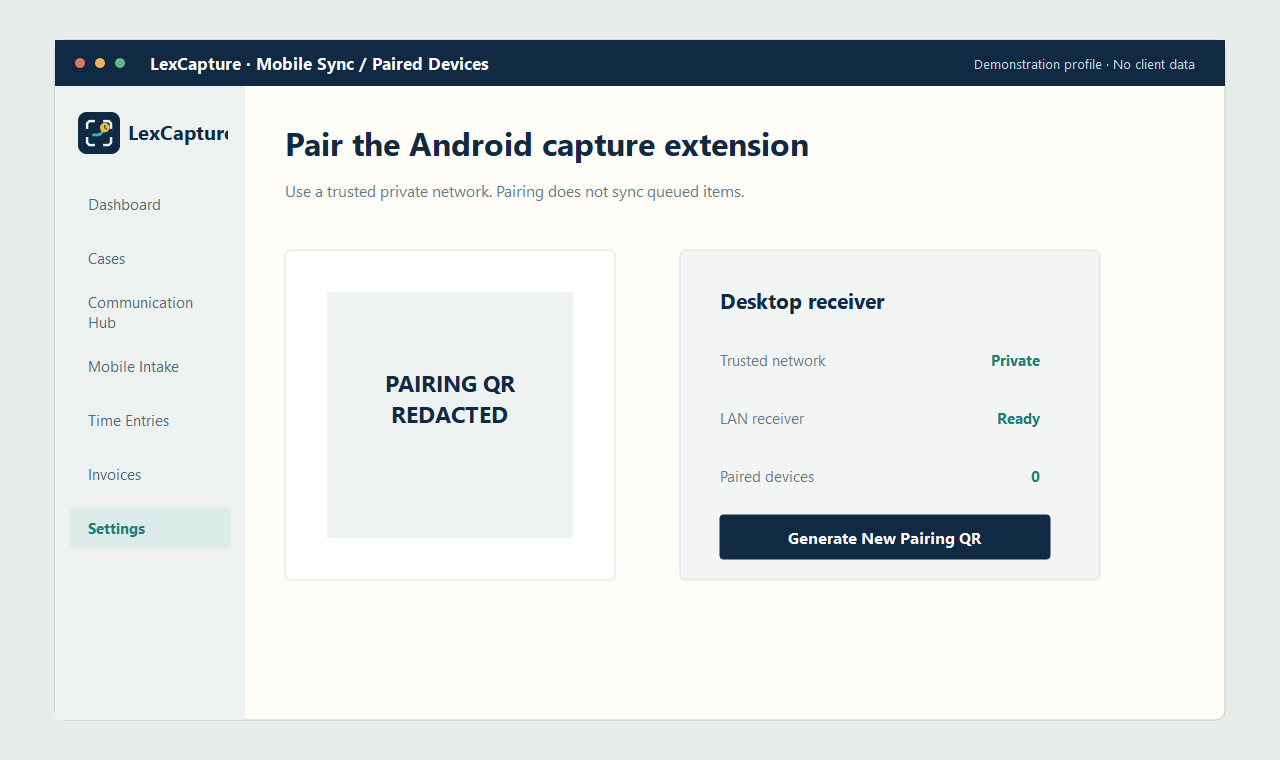
On a trusted private network, open Settings → Mobile Sync / Paired Devices. Start the LAN receiver and generate a new pairing QR. The QR pairs the phone; it does not sync queued items.

The public screenshot contains no live pairing QR, endpoint, token, device identity, phone number, or client data.

LexCapture mobile pairing window with demonstration pairing material redacted
STEP 11

Install and pair the Android extension

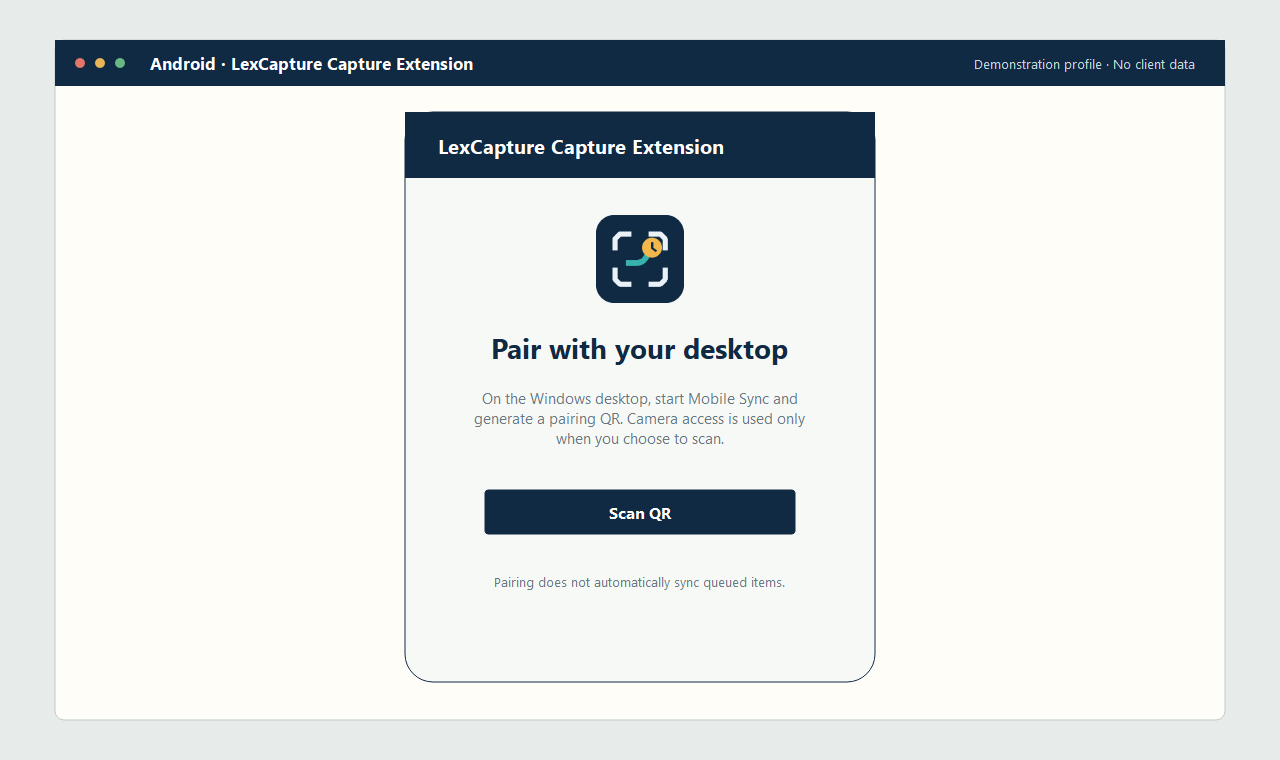
Install the LexCapture Android Capture Extension from the official LexCapture source. Open it, choose Scan QR, allow camera access only for scanning, and scan the QR shown by your desktop.

Android LexCapture Capture Extension showing the Scan QR setup action
STEP 12

Confirm the desktop and sync when ready

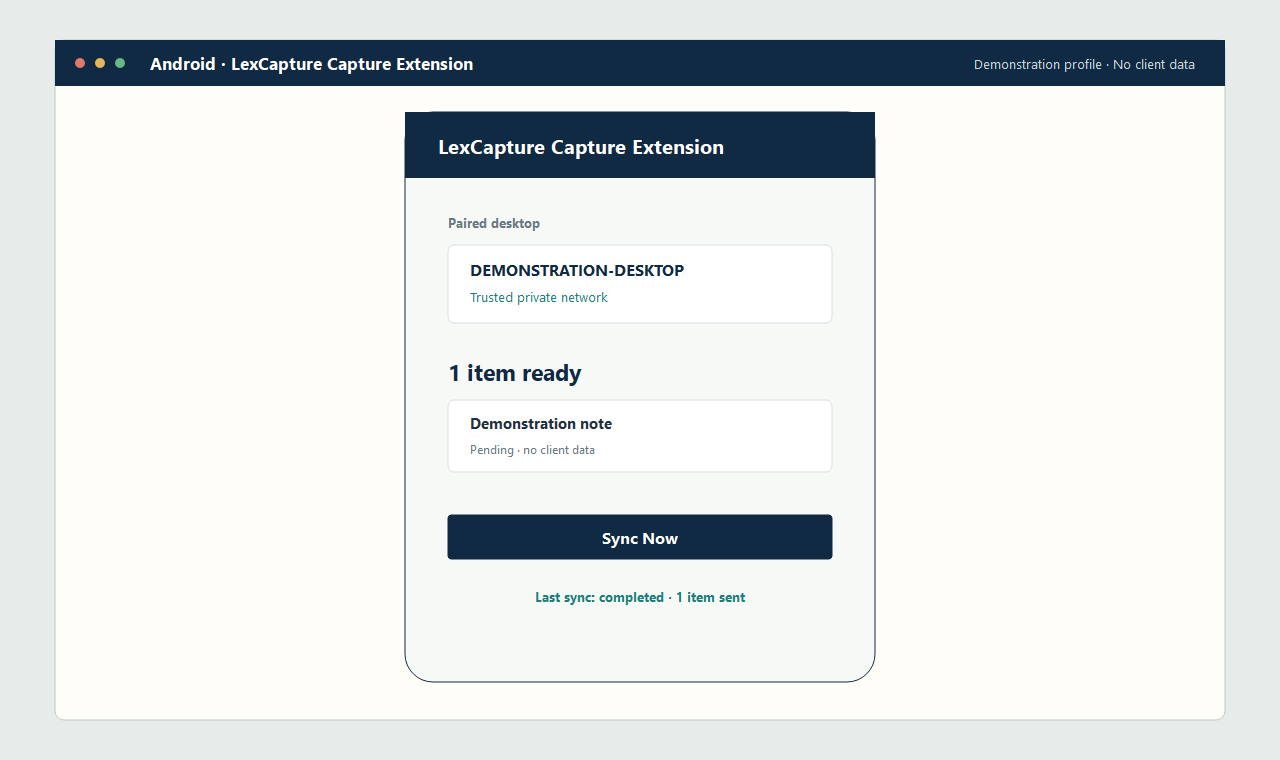
Confirm the masked desktop details before saving the pairing. Queue a non-client demonstration note, then choose Sync Now. Return to Mobile Intake on Windows to review it.

Android LexCapture Capture Extension showing a successful user-initiated demonstration sync

Before entering real matter data

Confirm sign-in and entitlement status, choose a backup location, understand your firm's retention policy, and test each enabled capture extension with non-client demonstration content.